Click on Bold Words

For links to the recipes in the posts, click on the bolded pink words!  

Tuesday, December 19, 2006

Great Idea!


Kudos to the minds over at Glad. They've come up with a great idea for affordable, easy to use bakeware that you aren't afraid you'll never see again when you go to a potluck or a food day! I used this with the breakfast casserole (recipe below) and I am so impressed. I was honestly worried b/c it is plastic, but it didn't melt and held up perfectly in my 400 degree oven! So, I highly recommend this product to anyone who may be in the market!!!

Easy (and Yummy) Breakfast Casserole


This is such an easy recipe to make. I often make it for work and it's so easy to put together the morning of, or prepare and bake the night before and simply reheat. Either way, it's delicious! I believe I'll be serving this for my Christmas morning brunch! Enjoy!

Ingredients:
2 packages (12 oz each) bulk pork sausage
1 medium bell pepper, chopped (1 cup)
1 medium onion, chopped (1/2 cup)
3 cups frozen hash brown potatoes
2 cups shredded Cheddar cheese (8 oz)
1 cup Bisquick (or store brand baking mix) mix
2 cups milk
1/4 teaspoon pepper
4 eggs

1. Heat oven to 400ºF. Grease rectangular baking dish. Cook sausage, bell pepper and onion in 10-inch skillet over medium heat, stirring occasionally, until sausage is no longer pink; drain. Stir together sausage mixture, potatoes and 1 1/2 cups of the cheese in baking dish.
2. Stir Bisquick mix, milk, pepper and eggs until blended. Pour into baking dish.
3. Bake uncovered 40 to 45 minutes or until knife inserted in center comes out clean. Sprinkle with remaining cheese. Bake 1 to 2 minutes longer or just until cheese is melted

Saturday, December 16, 2006

Best Oatmeal Cookies


I think oatmeal are by far my favorite cookies (well, right behind pumpkin walnut). This recipe is fantastic. I can't stop eating them! This is another refrigerate overnight recipe, so plan ahead! It's great b/c by chilling overnight, it allows the oats to soaks up the delicious flavors of the other ingredients. Make sure you cook directly on the pan, not on parchment paper, though it is tempting b/c of the easy cleanup!

Ingredients:
1 c plus 2 T all-purpose flour
2c rolled oats
1 t baking soda
1 t ground cinnamon
1/4 t ground nutmeg
16 T butter
3/4 c packed light brown sugar
3/4 c granulated sugar
1 t vanilla extract
1/2 t salt (omit if you are using salted butter)
2 lg eggs
1 c chopped walnuts
1 c raisins

Directions:

Mix the flour, rolled oats, baking soda, cinnamon, and nutmeg together thoroughly with a whisk or fork. Set aside.

Cut the butter into chunks and melt in a large saucepan over medium heat. Remove from the heat and stir in the brown sugar, granulated sugar, vanilla and salt. Whisk in the eggs. Stir in the flour mixture just until all of the dry ingredients are moistened. Stir in the walnuts and raisins. Cover and refrigerate overnight.

Preheat the oven to 325 Degrees. Position racks in the upper and lower thirds of the oven.

For large cookies: scoop about 2 level tablespoons of dough and place the cookies about 3 inches apart on the cookie sheet.

For small cookies: scoop 1 level tablespoon of dough.

Bake for 15-17 min for large cookies or 13-15 min for small cookies, or until the cookies are deep golden brown. Rotate sheets from top to bottom and front to back (it really makes a difference) about halfway through the baking time to ensure even baking. Use a metal pancake turner to transfer cookies to a rack to cool completely before storing or stacking.

Can be store in an air tight container for several days.

Cookie Menu


Being the dork that I am, I also made a Cookie Menu. I took a picture of each cookie I made and made a menu out of them. Inspired by the food network and the guide in the box of chocolates, I created this little gem. Plus I also included a personal note to each of the people I gave cookies to.

This picture of the Cookie Menu took me a while to do. It's not great, but you get the idea!

Christmas Cookies!


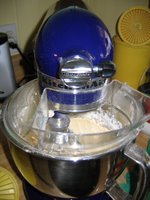
Well, I went a little nuts. I got a KitchenAid Stand Mixer, and I went a little nuts. I made so many cookies. I don't know if I can ever look at another cookie, let alone bake one. But, I have to say that I love the stand mixer. It is one of the best things I've ever bought. I made some Cream Cheese Sugar Cookies with the mixer and they were pretty tasty. Usually, I don't like sugar cookies and I have discovered I dislike making them into shapes (circles I can handle) but I enjoyed this recipe and I especially enjoyed the glossy sheen the icing gave to the cookies. It looked almost professional! I hope you enjoy this recipe as much as I did. Just remember to start early, the dough has to chill for 8 hrs before you can work with it!

Merry Christmas.

Cream Cheese Sugar Cookies

INGREDIENTS:
1 cup white sugar
1 cup butter, softened
1 (3 ounce) package cream cheese, softened
1/2 teaspoon salt
1/2 teaspoon almond extract
1/2 teaspoon vanilla extract
1 egg yolk
2 1/4 cups all-purpose flour
DIRECTIONS:
1. In a large bowl, combine the sugar, butter, cream cheese, salt, almond and vanilla extracts, and egg yolk. Beat until smooth. Stir in flour until well blended. Chill the dough for 8 hours, or overnight.
2. Preheat oven to 375 degrees.
3. On a lightly floured surface, roll out the dough 1/3 at a time to 1/8 inch thickness, refrigerating remaining dough until ready to use. Cut into desired shapes with lightly floured cookie cutters. Place 1 inch apart on ungreased cookie sheets. Leave cookies plain for frosting, or brush with slightly beaten egg white and sprinkle with candy sprinkles or colored sugar.
4. Bake for 7 to 10 minutes in the preheated oven, or until light and golden brown. Cool cookies completely before frosting.


Yummy Icing:


INGREDIENTS
1 cup confectioners' sugar
2 teaspoons milk
2 teaspoons light corn syrup
1/4 teaspoon almond extract
assorted food coloring
DIRECTIONS
-In a small bowl, stir together confectioners' sugar and milk until smooth. Beat in corn syrup and almond extract until icing is smooth and glossy. If icing is too thick, add more corn syrup.
-Divide into separate bowls, and add food colorings to each to desired intensity. Dip cookies, or paint them with a brush (or, I just used the back of a spoon.


A great cookie resource for all your holiday (and otherwise baking) is Allrecipes.com